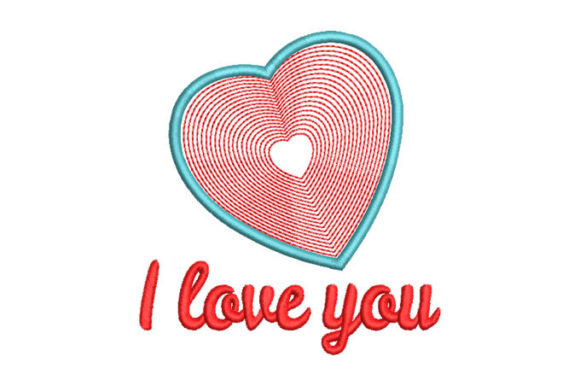
I Love You: Embroidery Design Review for Branded Merchandise
As an embroidery designer who has reviewed hundreds of machine embroidery designs for small business clients, I approach each file with a critical eye toward commercial viability. The I Love You design immediately stood out to me — not because of its sentiment, but because of its potential as a versatile asset for small business merch, embroidered patches, and brand identity items. In this review, I’ll walk through how this digital embroidery file performs in real business scenarios, where it shines, and where you need to be cautious before letting it hit production.
First Impressions: Friendly, Handmade, and Instantly Recognizable
Upon first look, the I Love You design reads as warm and approachable. The lettering style feels handcrafted — not overly rigid, but still clean enough to look professional on a finished product. It balances between a playful boutique aesthetic and a heartfelt message that works for cafés, florists, bakeries, or pet brands. The description notes it works with any fabric, which is a strong advantage for commercial embroidery shops that handle a mix of materials. I’d categorize the personality as friendly, slightly rustic, and premium without being formal. For a machine embroidery design labeled as a Freebies item, the quality expectation is met, but as always, testing is essential.
Real Business Use Cases for I Love You
This design is not just a decorative phrase — it can become a core element of a brand’s visual language. Here’s how different small businesses and apparel decorators can leverage it:
Embroidered Patches for Branded Merchandise
Patches are a popular way to add a logo or message without embroidering directly onto a garment. The I Love You wording, when stitched onto twill or felt, creates an embroidered patch that can be sewn or ironed onto jackets, totes, caps, or jeans. I see this working particularly well for a boutique or handmade shop that wants to sell limited-edition patches as customer gifts or add-ons. The phrase is universal, making it suitable for gift-with-purchase programs or event merch. Just ensure the letter spacing accommodates patch trimming — we’ll discuss that later.
Chest Logo Accent and Sleeve Detail on Uniforms
For a small café or creative studio, placing the design as a subtle chest logo (about 3 to 4 inches wide) on apron or work shirts can reinforce a loving, community-focused brand. Similarly, a sleeve detail (smaller, around 2 inches) on a cap or t-shirt sleeve can act as a consistent brand marker across staff custom apparel. The design’s simplicity helps it scale down without losing readability, but careful digitizing is key.
Cap Embroidery and Curved Surfaces
Embroidering on caps is a frequent request in small business merch. The I Love You design spans multiple words, which can be tricky on a curved cap front. Because it’s a three-word phrase, the design may need to be split or formatted to follow the cap curve. I recommend testing it on a structured cap first, using a mid-weight stabilizer, and keeping the design under 4 inches wide. If it’s too long, the last letters might wrap into the seams. In that case, consider using a shorter version or placing it on the back of the cap instead.
Tote Bag Design and Apron Embroidery
Tote bags are a staple for brand identity giveaways. The I Love You design can be centered on a canvas tote as a primary statement or placed on the pocket. Because canvas can be thick and textured, test the stitch density — too many stitches might cause puckering. For apron embroidery, the design works on the chest panel or as a small logo on the waistband. I’ve seen similar phrases used by bakeries and florists on their staff uniforms, reinforcing a personal touch.
Handmade Product Labels and Packaging Accents
For Etsy sellers and craft brands, handmade product labels can include an embroidered patch sewn into the packaging or a tiny version of the design on a hang tag. While the design is meant for fabric, you can also use it as a printable mockup element for product shots. The digital embroidery file allows you to create mockups without stitching, helping customers visualize the finished product before ordering.
Where to Use This Design Carefully
Even a well-designed file has its limits. Here are the key trouble spots I’ve identified for I Love You:
- Small patch sizes: If you shrink the design below 2 inches, the individual letters may lose detail, especially serifs or thin strokes. Always test at the intended patch size before bulk production.
- Cap fronts and curved surfaces: As mentioned, the length of the phrase requires careful hoop placement. Use a small hoop (e.g., 4x4) and consider a curved text option if your software allows.
- Tiny lettering and high stitch density: The design description says it works beautifully on any fabric, but dense stitches on lightweight knits or silks can cause distortion. For thin fabrics, use a tear-away stabilizer and reduce density if possible.
- Detailed outlines: If the design has visible outlines, they might add unnecessary stitches. Test without outlines to see if the fill alone is sufficient for readability.
- Textured fabric and dark uniforms: On fleece, terry, or dark garments, choose thread colors with high contrast. A light pink or white on navy or black works well. Avoid similar tones.
- Items needing frequent washing: For aprons or work shirts that are washed daily, use a high-quality polyester thread and a permanent adhesive stabilizer to prevent fraying. The machine embroidery design should hold up if properly digitized.
How I Love You Affects Brand Identity and Customer Trust
When a small business adds an embroidered design like I Love You to merchandise or uniforms, it sends a message of care and personal connection. Customers perceive the brand as thoughtful and detail-oriented. For a bakery or flower shop, the phrase reinforces the emotional aspect of the purchase. For a pet brand, it plays into the love people have for their animals. This design can increase product value because embroidery itself signals quality. A well-stitched embroidered patch on a tote bag makes the item feel like a keepsake, not just a freebie. However, if the stitching is poor — misaligned letters, thread breaks, puckering — it can damage professional credibility. Consistency across all items, from caps to aprons, builds recognition and trust.
In terms of buyer engagement, the design is shareable. People are more likely to post a photo wearing a “I Love You” shirt or carrying a matching tote. That organic visibility is gold for a local business. The handmade presentation of an embroidered product also appeals to the growing preference for artisanal goods over mass-produced items.
Practical Embroidery Designer Notes Before Production
Before you send I Love You to your embroidery machine, here are the checks I run on every new machine embroidery design:
- Test it in black and white first. A single-color test (say, white thread on black fabric) reveals any letter shape issues, spacing uniformity, and size scaling problems without wasting thread.
- Check if it works at small patch size. Create a test stitch at 2.5 inches wide. If the letters crowd or lose clarity, enlarge or adjust the design. The description says it works with any fabric, but size adaptability is something you must verify.
- Review thread color contrast. For brand identity items, the thread color should match your brand palette. On dark uniforms, use bright or metallic threads. On light fabrics, pastels or bold colors both work.
- Inspect spacing between letters and words. Especially with script or cursive styles, tight spacing can cause the thread to blur together after washing. If needed, adjust the digitized file to add a tiny amount of space.
- Confirm hoop size. The design likely fits a standard 4x4 hoop, but verify the dimensions from the file metadata. For tote bags, a larger hoop may be needed if you want the design centered on the front panel.
- Test on real fabric with proper stabilizer. Run a sample on the exact fabric you plan to use (e.g., cotton twill, canvas, denim, polyester). Use a medium-weight cut-away stabilizer for knits and a tear-away for wovens. Adjust tension as needed.
- Create a printable mockup for client approval. Before production, stitch out a sample and take a photo. Better yet, edit a digital mockup using the embroidery file to show placement. Clients appreciate seeing how the design will look on aprons, caps, or totes before committing.
- Compare it beside other design assets. If your brand already uses a specific font or graphical style, ensure I Love You complements those assets. For instance, a vintage bakery might want a more ornate script than this design offers.
- Confirm commercial licensing. Since this is a Freebies category design, double-check the license terms for commercial embroidery. Some free designs allow unlimited use, others restrict resale of stitched items. If not clearly stated, contact the designer or assume restricted use.
- Plan for multiple file formats. The description mentions multiple embroidery file formats. Ensure you have the correct format for your machine (e.g., PES, DST, EXP, ART). Test that the file opens without errors.
Finally, remember that while I Love You may be a free download, its value in your product lineup depends on how well it integrates with your brand. Don’t use it just because it’s free — use it because it fits the story you’re telling. With the right preparation, this machine embroidery design can become a signature element in your small business merch, strengthening brand identity and delighting customers. Happy stitching!